

In this guide, we’ll walk you through how to set up five of the most effective tarp shelters for every outdoor scenario. The shelters we detail in this blog post rank among our favourites primarily because they are easy to set up, reliable, and offer a high degree of versatility. Let’s do this!
What is the best camping tarp shelter?
We get asked this question all the time, and our answer is always the same. There isn't a single "best" tarp configuration that fits all scenarios. Instead, the ideal setup relies on a bunch of factors - from external conditions and weather patterns to the specific terrain you find yourself in, and even down to personal preferences and comfort. Simply put, the best tarp shelter is the one that best suits your needs in any given circumstance.
With that in mind, here are some of our all-time favourite camping tarp shelters for a range of conditions. We find ourselves coming back to these, over and over again. It doesn’t matter whether you are a beginner or an expert, everyone can benefit from learning these classic camping tarp configurations.

Setup 1. A-Frame (High Ridgeline)
An open, airy camping tarp shelter perfect for warm weather.
Tarp campers joke that the A-Frame is like vanilla ice-cream – basic yet beloved. But, jokes aside, the A-Frame is one of the most popular camping tarp shelters out there for good reason. It is simple, effective and works great with any camping tarp size. This high ridgeline variation of the A-Frame is our go-to for camping in warm, humid conditions because it allows for optimal airflow and ventilation while still being protective.
Setup Instructions
- Find a suitable campsite with two sturdy trees (or other anchor points) roughly 4 to 5 metres apart.
- Tie one end of your ridgeline to the tree at head height or higher. We suggest using a Siberian Hitch for this.
- Feed the ridgeline through the tie-out loops along the middle apex of the tarp.
- Fix the end of the ridgeline to the second tree using an Adjustable Guyline Hitch, adjusting the tension until the ridgeline as required.
- Tie a Prusik Knot onto the ridgeline near each end of the middle apex of your tarp, leaving the ends of each Prusik Knot loose.
- Tie off the ends of each Prusik Knot through the outer-edge tie-out loop on the middle apex. A simple Reef Knot does the trick.
- Slide the Prusik Knot up the ridgeline to hold the tarp tightly in place.
- Attach a guyline to each corner of the tarp using a Bowline Knot, then peg out and adjust until taut.

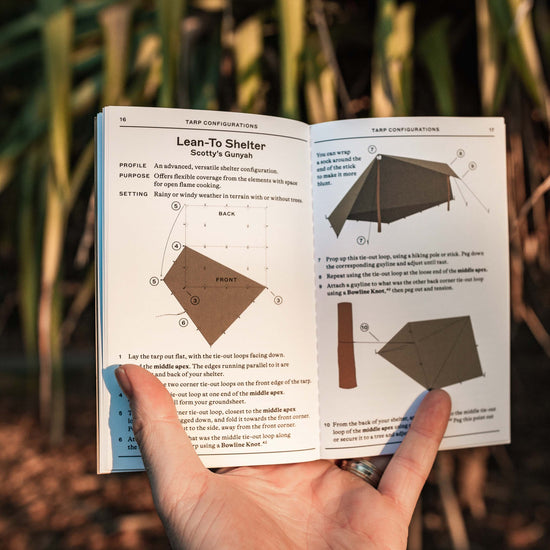
Setup 2. Lean-To
A spacious, open-sided camping tarp shelter for mild conditions.
The Lean-To is another camping tarp shelter that we keep coming back to, again and again. The open-sided configuration gives you plenty of usable space (and a great view of your surroundings) while still providing adequate protection if the weather changes. You can use any sized tarp, but we find that the 3m x 4m Ultralight Tarp works best for this setup if you are camping with 1-2 other people.
Setup Instructions
- Find a campsite with two anchor points, such as trees, approximately 4 to 5 metres apart.
- Attach your ridgeline to the first anchor point using a Siberian Hitch.
- Feed the ridgeline through the tie-out loops along the quarter apex of your camping tarp.
- Secure the end of the ridgeline to the second anchor point using an Adjustable Guyline Hitch.
- Tie a Prusik Knot onto the ridgeline near the edge of your tarp, using a Reef Knot to tie the loose ends of the Prusik Knot through the tie-out loops on the quarter apex.
- Adjust tension on your camping tarp until tight by sliding the Prusik Knots along the ridgeline.
- Peg down the back two corners of the tarp directly into the ground, adding additional pegs along this edge if required.
- Lastly, use a Bowline Knot to attach guylines to the outer corners of the raised side of your tarp and then peg out so everything is taut.

Tarp Shelter Setup 3. A-Frame (Low Ridgeline)
A protective camping tarp shelter for cold or wet weather.
Yes, we’re back to the A-Frame! It might not be the most exciting camping tarp shelter out there, but the low ridgeline variation of the A-Frame is an absolute classic. This protective configuration is pitched low to the ground, ideal when you are camping in cold or wet conditions when you want to preserve warmth.
Setup Instructions
- Find a suitable campsite with a level, well-drained ground. You need to be able to drive the pegs into it, so make sure that the ground is not too hard or rocky.
- Lay your tarp down flat on the ground. The open ends (where you get in and out of your shelter) should be facing away from the wind
- Peg down the outer edges of one of the wall sides of your tarp.
- Use a Bowline Knot to attach guylines to the middle apex tie-out points on both open ends.
- Then, prop up the middle apex tie-out point with a hiking pole or stick and peg out the attached guyline until holding securely.
- Do the same on the other open side.
- Adjust the tension on the guylines until everything is holding taut.
- Peg down the corners on the other edge. Add extra pegs along the wall sides for extra protection if required.

Setup 4. Bivvy Tarp Shelter (Hunchback)
A low-profile tarp shelter for camping in wet, cold and windy conditions.
The Bivvy Tarp Shelter is up there among our favourite camping tarp setups for camping in wet, muddy or cold conditions because it effectively sheds rain, blocks wind and helps keep you warm. The hunchback variation provides even more protection, as well as a little extra room to move around. That said, this camping tarp shelter is not the most spacious configuration out there, so we recommend using either a 3m x 3m or 3m x 4m Ultralight Tarp.
Setup Instructions
- As always, start by finding a suitable campsite with an anchor point, such as a tree, nearby.
- Using a Bowline Knot, tie a guyline to the tie-out loop on the middle apex of your camping tarp. This will form the peak of your shelter’s opening.
- Tie the other side of the guyline to the anchor point, securing it at hip-height using a Siberian Hitch.
- Prop a hiking pole or stick directly under the next tie-out loop in from where the guyline is attached.
- Pull the opposite corner away until your tarp is taut and then peg the corner tie-out loop directly into the ground.
- Now, head back to the opening to adjust the guyline, increasing the tension until the hiking pole or stick is secure.
- Peg the tie-out loop three loops down from the middle apex of your tarp (where the guyline is attached) to the ground. Do the same on both sides to form a symmetrical opening into your shelter.
- Finally, tuck the edges of the tarp underneath so they form the ‘floor’ of your shelter.
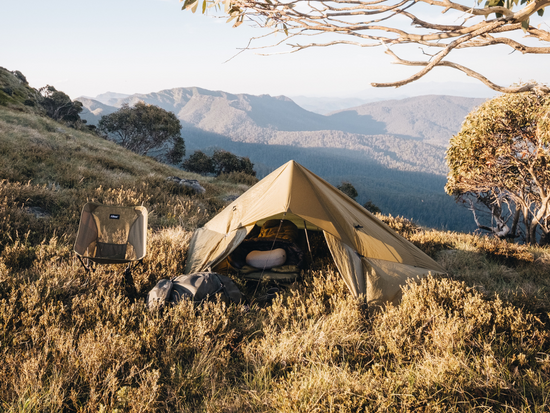
Setup 5. Tarp Tent
A rugged camping tarp shelter for inclement weather and exposed terrain.
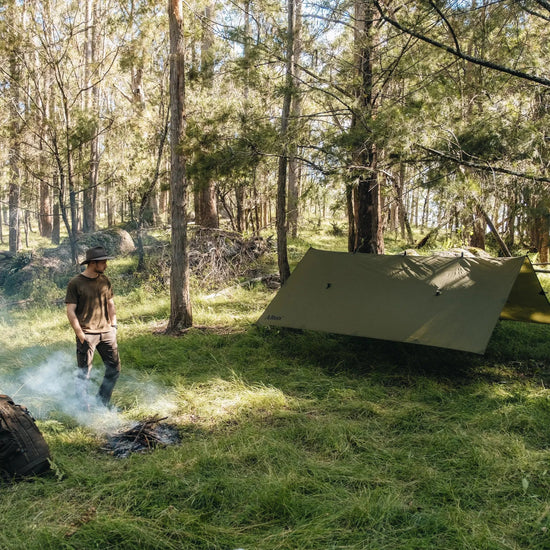
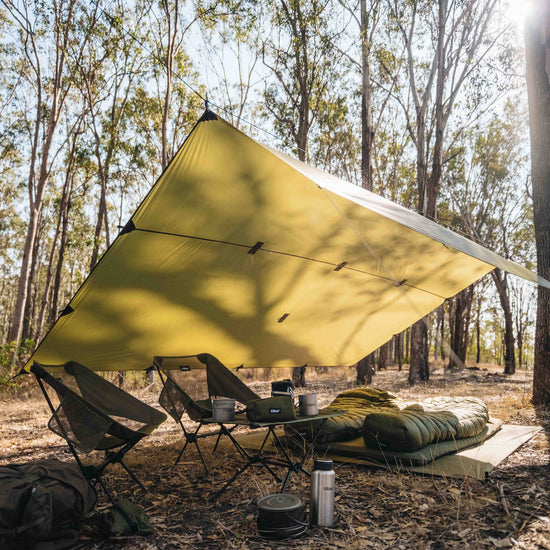
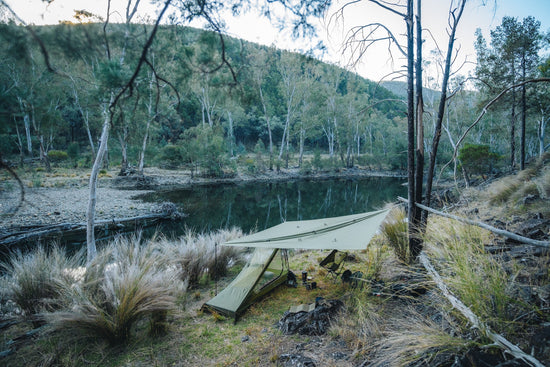
The Tarp Tent, as the name suggests, combines the concepts of a traditional tent with the minimalist functionality of a tarp. This setup uses a pole or stick for structural support to create an enclosed space, just like a tent (pictured in feature image). As well as offering reliable protection from the elements, this camping tarp shelter does not utilise a ridgeline, making it a top choice for exposed terrain where you can’t access trees or other anchor points. This particular setup works best with the 3m x 3m Ultralight Camping Tarp.
Setup Instructions
- Once you have found a suitable campsite, lie your tarp out flat with the tie-out loops facing up.
- Locate the middle apex of your camping tarp. The edges running perpendicular to it will be the front and back of your shelter.
- Start at the back. Peg down the first tie-out loop in from each corner, then peg down the first tie-out loop in from each corner along the side edges. This will leave two small triangle shapes on each corner – tuck them in under the rest of the tarp.
- Move around to the front of your shelter, where the opening will be. Pick up the left front corner and move it in line with the corresponding peg at the back of the tarp, then peg it down. Do the same for the right.
- Tie a guyline to the middle apex tie-out loop on the front edge using a Bowline Knot.
- Still working along the middle apex, prop a hiking pole or stick under the first tie-out loop in from the front edge.
- Peg out the guyline and adjust the tension until everything is holding securely.
- Next, tie a guyline to each of the tie-out loops immediately to the left and right of the middle apex along the front edge using a Bowline Knot again. Leave these guylines hanging loose for a moment.
- Using ultralight tent pegs, stake down the second tie-out loop in from the front corner along the side edges on both sides.
- Attach the loose guyline on the left to the left guyline peg. Repeat on the right.
Get out there and give these camping tarp shelters a try!
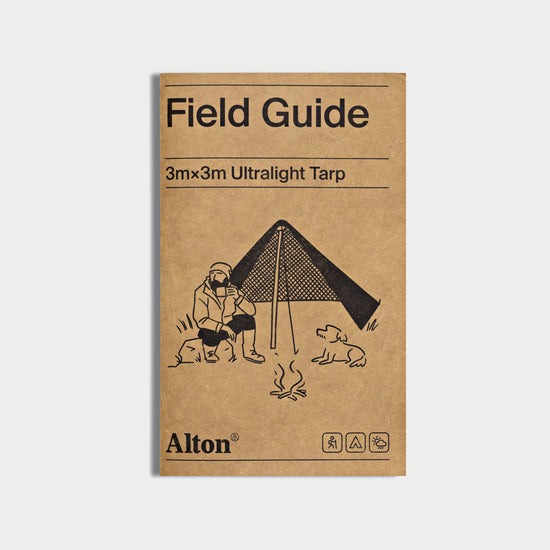
There you have it! These are endless camping tarp configurations to try, but we think the five we’ve covered today are right up there as the most simple, reliable and functional. If you are new to tarp camping or just keen to learn a few new configurations, our Tarp Camping Field Guide includes step-by-step instructions with diagrams for 22 different camping tarp shelters, as well as essential knots, care tips and more.
So, which setup are you most excited to try? If you have a favourite that we didn’t cover here, send us a DM on Instagram, we’d love to check it out!