


Although we’ve developed our sleeping mat to be as tough and durable as possible, punctures still can (and do) occur.
Fortunately, most punctures are easy to repair and will not cause lasting damage to your sleeping mat.
If you suspect your sleeping mat has a puncture, we recommend the following steps to identify and repair the damage:

Step One: Rule Out Other (Non-Puncture) Issues
There are few common issues that can make your sleeping mat seem like it’s leaking, when it is actually just a normal ‘side-effect’ of using your sleeping mat in certain conditions or user error.
Take a moment to review the most common (non-puncture) issues before you break out your repair kit:
-
The sleeping mat valve isn’t fully closed.
It might sound silly, but an incorrectly sealed valve is the #1 most common cause of sleeping mat deflation and can be easily mistaken for a slow leak.
So if your sleeping mat seems to have a slow leak, always start by checking that your valve is closed correctly before jumping to conclusions.
Inspect the valve area. Is it clean and free of debris? If there is any sand or dirt in there, then this could be preventing the valve from sealing properly. Use a soft cloth to wipe around the inside of the valve to clean it.
Then, when sealing the valve, ensure the outer cap of the valve is completely pressed into the socket, so that it is flush against the surface of your sleeping mat.
-
The sleeping mat fabric is stretching.
Another common reason that sleeping mats can seem to lose air overnight is because the fabric naturally stretches out with use. This is more noticeable if the sleeping mat is brand new or hasn’t been used in a while.
When you inflate your mat, the fabric is under tension, especially when you add your weight on top. As a result, the material will stretch slightly over the next hour or two, making the mat feel softer than it did when you first inflated it. This effect can be more noticeable depending on the fabric and baffle design of your sleeping mat - some materials have more ‘give’ than others.
So, how do you tell if you have a leak or if it’s just the fabric stretching?
If you notice your sleeping mat is partially deflating in the first few hours after inflation (but never going completely flat), then try reinflating it once. If the pressure stays steady after that, then it is quite likely that fabric stretch was the issue.
Another way to reduce this effect is to avoid over inflating the sleeping mat, which can put extra stress on the materials and cause them to stretch out faster. Besides, overinflation makes your sleeping mat more prone to punctures and less comfortable to sleep on, anyway, so it’s a win-win-win.
-
Temperature changes are causing a pressure drop.
Most people don’t realise that it’s completely normal for sleeping mats to become softer overnight due to the change in air pressure inside the mat as the temperature drops.
We’ll spare you the science lesson, but the main takeaway here is that as the air inside your sleeping mat cools down, it ‘shrinks’ – meaning it takes up less space in your sleeping mat.
The natural ‘air shrinkage’ effect is more noticeable in cold conditions and if you inflate your mat with your breath (which is around 34ºC when exhaled). It also can occur in scenarios where you leave your mat inflated for the day in cool to cold weather; after you get out of bed, the air inside your sleeping mat cools down and compresses, causing the mat to feel softer when you get back to camp at the end of the day.
Because of this, it’s normal to need to top up your sleeping mat more frequently in cool to cold conditions, especially if you inflate your sleeping mat by blowing directly into the valve.
To help minimise the air compression effect, we recommend using the purpose-built Ultralight Pump Bag, as it reduces any difference in the internal air temperature of your mat and the ambient external temperature.

Step Two: Locate the Puncture
If you’ve ruled out other non-puncture possibilities and your mat is still deflating, it’s time to look for a puncture.
Finding a puncture can be a bit fiddly, but if done correctly, it is possible to accurately identify extremely small punctures that cause slow leaks. We recommend trying the following methods to locate the puncture:
-
Initial inspection
Start with an initial inspection of your sleeping mat to check for any signs of damage.
Inflate your sleeping mat as usual and close the valve, ensuring it’s sealed properly, then working from top to bottom, carefully look over each section of your mat. Apply gentle pressure as you go and listen for any hissing sounds that indicate air is escaping.
Flip the mat over and repeat the process on the other side. Check all along the seams, corners, and the valve. If you find a puncture, mark the spot with some tape or a permanent marker (don’t worry, you’ll be covering this up with a repair patch, anyway).
-
Use a soapy water spray
If your initial inspection didn’t turn up any results, then the soapy water method might yield better results.
For this, you’ll need a few supplies:
- Soapy water solution (use gentle hand soap or wilderness wash)
- Clean spray bottle or a bucket
- Marker pen or tape
Once you have your soapy water solution ready, inflate your sleeping mat and close the valve securely.
Begin to spray or wipe over the surface of the mat so it’s fully saturated. Repeat the processes on the other side of the mat, and don’t forget to check the seams, corners, and around the valve, too.
As you work, watch for bubbles forming – if you spot any, press around the area to see if more bubbles form. This indicates there is a puncture.
If you find a puncture, wipe off the area with a dry cloth and use a permanent marker or a piece of tape to mark it. Ensure the area is clean and then leave the sleeping mat to dry completely before proceeding to the repair process explained in the next section.
-
Submerge the sleeping mat in water
Another effective method to identify punctures is to submerge your mat in water (being careful not to get water into the mat) and watch for bubbles.
To do this, it works best to fill up the bathtub with enough water to cover the mat, but you can also use a large sink or bucket if needed.
Inflate your sleeping mat and close the valve securely. Then, working in sections, submerge your sleeping mat and squeeze or press down on the mat to increase the pressure and help force the air out of the puncture. Watch carefully for bubbles as you do this.
Once you do identify a puncture, clean and dry the area, then mark it with tape or a permanent marker and leave the sleeping mat to dry completely before starting the repair process explained in the next section.
Still can’t find the puncture?
If you get through all these steps and still not be able to identify the source of the problem, we encourage you to get in touch with us – we’ll do our best to help.

Step Three: Repair the Puncture
Once you’ve found the puncture, fixing it is pretty straightforward. Here’s what you need to do:
-
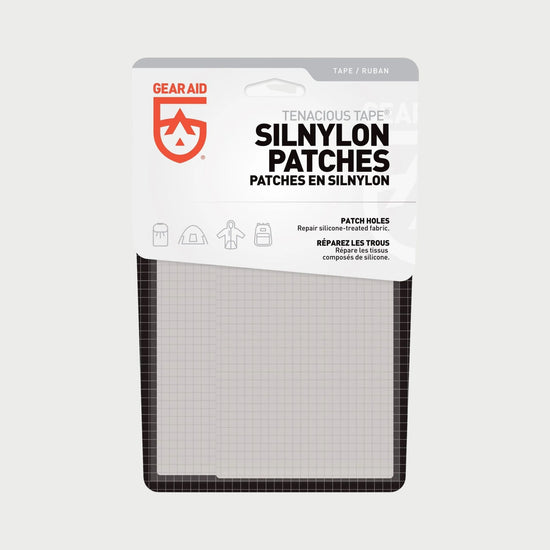
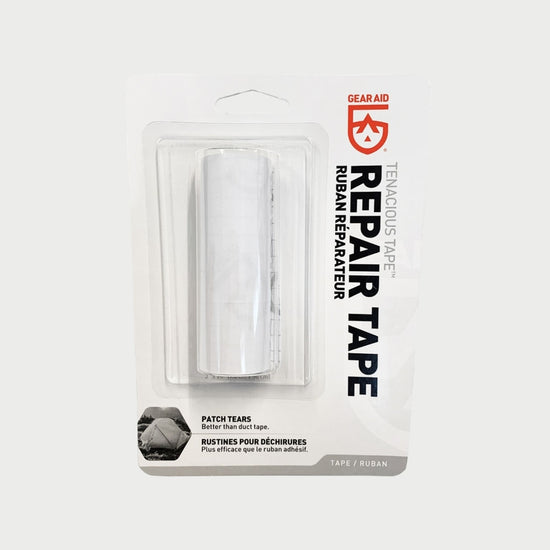
Get your sleeping mat repair kit.
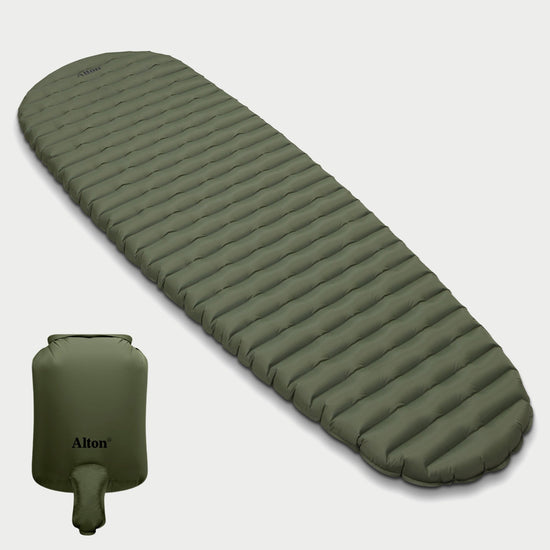
All Alton sleeping mats come with a repair kit included. This is located inside the inner pocket of the storage sack (it’s easy to miss it!) and comes with pre-cut self-adhesive repair patches specifically for your sleeping mat. No glue or additional materials are required. If you are using an alternative gear repair tape, follow the instructions provided on the packet.
-
Prepare the puncture site.
Deflate your sleeping mat and lay it out on a flat surface so the puncture site is as flat as possible. Your sleeping mat should be clean and completely dry before attempting to apply the repair patch. If needed, clean wipe off the area with an alcohol wipe and allow to dry for a few minutes before continuing.
-
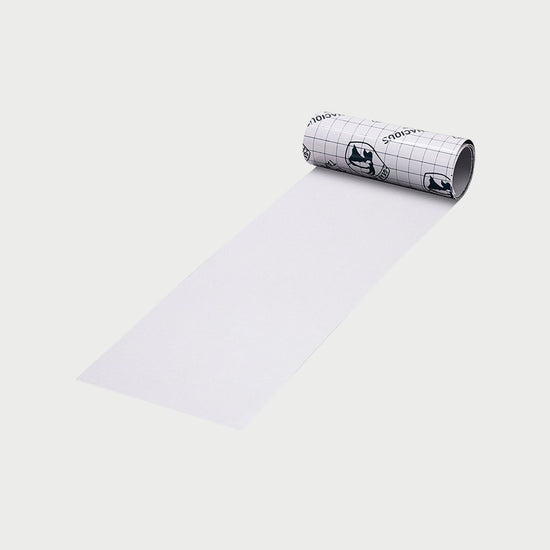
Apply the repair patch.
Remove the adhesive backing from the repair patch and press it firmly into place over the puncture. Press it into place until the entire patch is stuck to the sleeping mat surface. It should be completely adhered, with no signs of bubbles or peeling.
-
Allow the adhesive to cure before use.
We recommend leaving the repair patch adhesive to cure for 24 hours before inflating your sleeping mat. However, if you are out in the field and can’t go that long without your mat, then wait at least 30 minutes before inflating it.
-
Test the sleeping mat before your next trip.
After applying the repair patch and giving it adequate time to cure, we recommend double checking that the mat is holding air as expected before taking it on the next trip.
Have a question about sleeping mat repairs? We’re here to help.
We’re committed to making the best sleeping mats Australia has on the market, built to last for years of adventure. As a part of that commitment, we do our best to support our customers if their Alton gear is not performing as it should. So, if you ever run into issues or have questions about repairs, get in touch – we’re here to help.