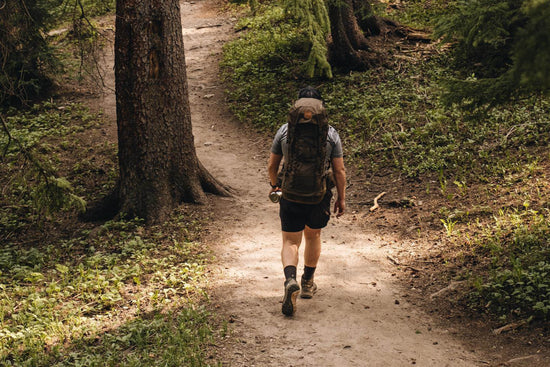

Here at Alton, we are firm believers that everyone who spends time outdoors should learn at least a few basic bushcraft skills.
In today’s blog, we’ll take a look at the five essential basic bushcraft skills everyone should know. We’ll give you our take on all bushcraft skills, as well as some tips and advice to help get you started learning each of these activities.
So, are you ready to get cracking? Of course you are!
A quick note about responsible bushcrafting
We all have a responsibility to protect the wild places we enjoy. That’s why you need to check if there are any regulations for the places you plan to visit before you practise any of the basic bushcraft skills we mention today.
Many National Parks and recreation areas have laws in place to protect and preserve delicate ecosystems that may prohibit certain bushcraft activities. And even if there are no specific regulations in place, always follow Leave No Trace principles to minimise your impact on the environment.
And last but not least, please remember that safety is your number one priority.
Essential Bushcraft Skills
There are a lot of bushcraft skills that might be called ‘essential’ depending on where you are and what you are doing, but here are the top five that we think everyone should learn:
- Firecraft
- Shelter Building
- Water Collection & Purification
- Navigation
- Wilderness First Aid
Mastering these five skills will give you a solid foundation of practical bushcraft knowledge and serve as a starting point for other important wilderness skills, such as knifecraft, signalling, foraging, weaving, knot tying and more.

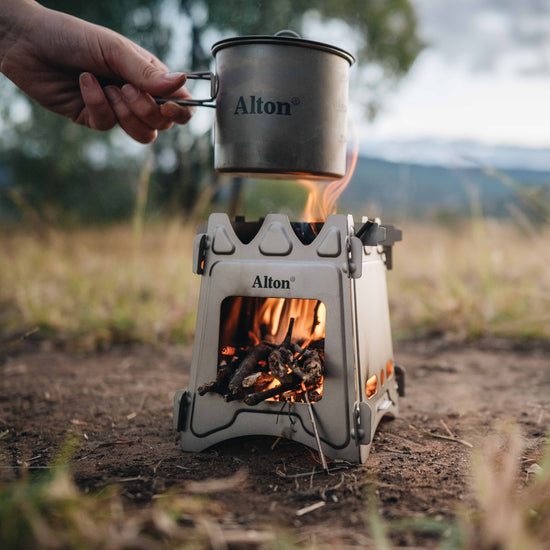
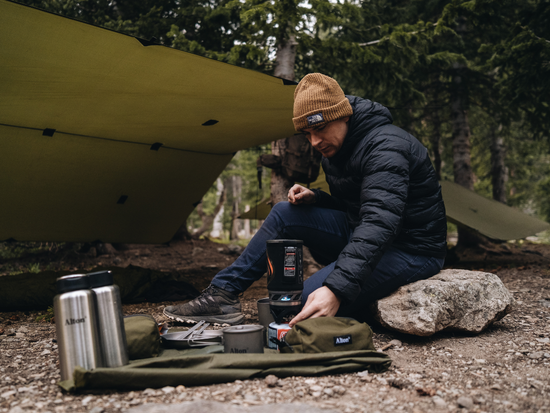
Essential Bushcraft Skill #1: Firecraft
Firecraft is the art of starting, maintaining and controlling a fire in the great outdoors. There are three fundamental firecraft rules everyone should know:
- Always check if there are any fire bans or restrictions in place (and follow them).
- Knowing how to extinguish your fire is just as important as knowing how to start it.
- Never leave your campfire unattended until it is completely extinguished.
Ok, now go back to rule number one and read them through again so that you’re 100% sure you won’t forget. Got that?
How to extinguish a campfire
Before you even start preparing to build your fire, you should already be thinking about how you’re going to extinguish it.
The most effective way to extinguish a campfire is by drowning it with water. Here’s how:
- Slowly pour water onto the campfire, stirring it through the embers with a sturdy stick or a shovel as you do. Break up any larger embers and keep stirring in water until the hissing sounds stop. Scrape and spread the embers around to make sure there are no hidden clumps or pockets where heat can linger. You’ll need quite a lot of water to do this, so don’t be stingy!
- Once everything is completely soaked through and no longer hissing, check for warmth by holding the back of your hand near the embers. If they are still giving off heat, repeat steps 1 and 2 again.
- Stick around for at least 30 mins and then check the embers again to ensure they are cool enough you could touch them. If you can still feel warmth or see signs that some of the embers might still be smouldering, repeat this entire process over again!
In locations where water is scarce, you can pour sand or dirt over the fire and mix it through the ashes, breaking up the clumps and spreading them out to avoid hidden pockets of heat just like you would with water.
However, be warned, this method is not as effective and it can take at least a couple hours for the embers to completely cool down. You can repeat the process a few times to speed things up, but it is your responsibility to monitor the embers until they are cool.
How to build a campfire
On the most basic level, starting a fire requires heat, fuel and oxygen. You need all three of these in the right balance to ignite and sustain a fire. Here’s how it works:
- Start by creating a designated fire ring that is clear from flammable debris and well away from your shelter and gear, as well as overhanging branches.
- Collect your fuel and have it ready to use beside your campfire. Your fuel should include:
- Tinder, made from dry, flammable materials like bark dust, fine wood shavings, or other flammable, fibrous organic matter.
- Kindling, usually small, dry sticks, dried leaves or twigs.
- Fuel Wood, a.k.a dry, seasoned wood.
- Once you have your fuel, place down a bed of dry leaves or bark in your fire ring to provide insulation and airflow for your tinder. On top of this, build a tinder nest in the centre, and then add a few pieces of kindling around the tinder nest in a pyramid, leaving plenty of gaps for air.
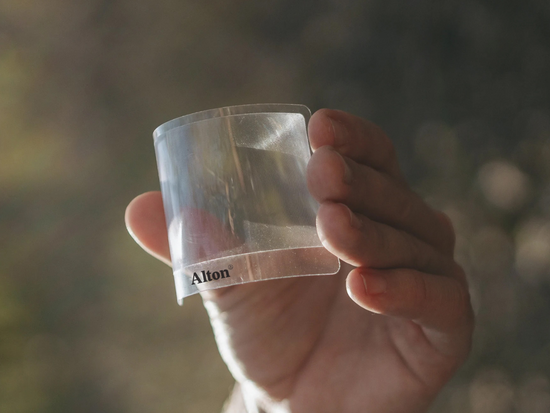
- Use a fire starting method of your choice to create heat, such as friction such as a bow drill or hand drill, sparks from a flint steel or ferro rod (also called ferrocerium), using magnified sunlight with a fresnel lens, or just with a lighter or some matches. Use this to ignite your tinder.
- Once the kindling is beginning to burn, you can gradually add larger pieces of dry wood to the base of the pyramid.
Firecraft tips
- Use dry, seasoned wood. Using damp or green fuel will make starting a campfire a whole lot harder. If you are collecting fuel out in nature, look for materials that are brittle and snap easily.
- Carry multiple fire starting tools. For example, we often use a fresnel lens to start our campfire, but we will usually carry some waterproof matches and a lighter as a backup.
-
Be patient and build your campfire up slowly. Begin with a small tinder nest and gradually add kindling and fuelwood as the fire grows.
- Fire needs oxygen to burn, so ensure it has sufficient airflow by building it loosely and avoid smothering the flames with too much material all at once.
- Start out learning firecraft in safe, controlled environments where you aren’t solely reliant on your campfire for warmth or food.

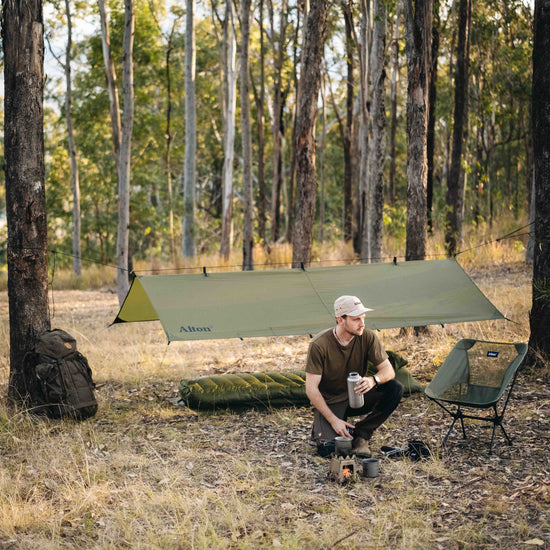
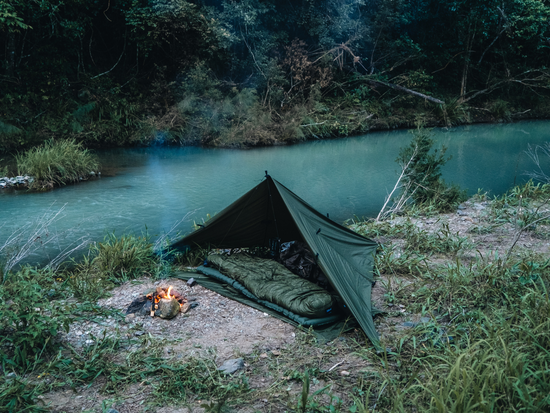
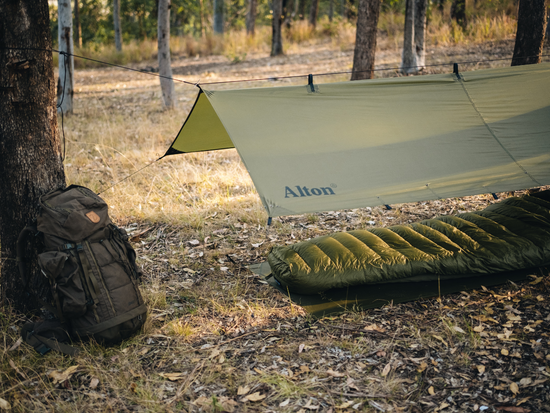
Essential Bushcraft Skill #2: Shelter Building
Shelter building is a way to connect with nature, challenge yourself, and gain valuable bushcraft knowledge – and it could just be life-saving in an emergency situation.
Bushcraft shelter building tips
The specific steps to building a shelter for bushcraft will vary depending on the environment and resources available to you.
However, there are some basic guidelines that underpin all effective bushcraft shelter building:
- Location is key for bushcraft shelter building. Choose well-drained, elevated ground, making sure to check for potential hazards such as dead branches overhead, ant nests or campsites that may be prone to flooding. Consider the wind direction, sun exposure, and proximity to water sources.
- Use sturdy materials to build a safe, structurally sound shelter. Any bushcraft shelter worth its salt should be able to protect you from unpredictable weather conditions while still allowing good ventilation and airflow.
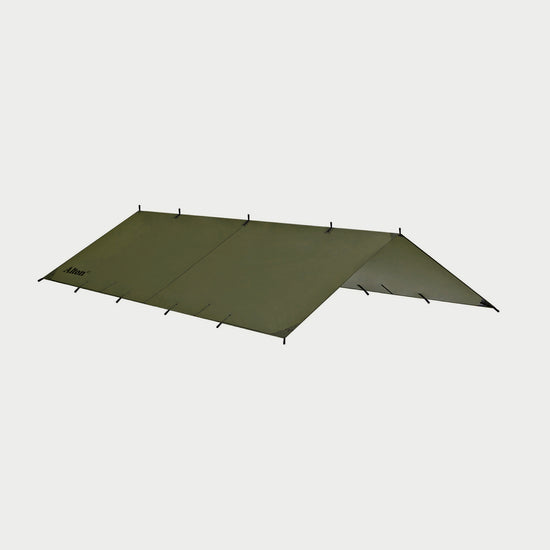
- Start with basic, easily constructed shelters like lean-tos or tarp shelters. A lightweight hiking tarp can be used as a stand-alone shelter, or used as a part of a bigger building project. Check out our blog, Everything You Need to Know About Tarp Camping to master some basic tarp setups.
- Be mindful of your impact on the environment. If you are building using vegetation, always try to utilise found natural materials like fallen branches, leaves, and rocks. Refrain from digging trenches or harming live vegetation for shelter construction unless you’re building on your own property.
- Leave No Trace. That means dismantling your shelter when you’re done and leaving your campsite cleaner than you found it. No excuses!
Don’t forget to check for any regulations that may prohibit or restrict the collection of natural materials before you build a shelter. Whatever style of shelter you’re making, designing and constructing a shelter requires you to think critically and act responsibly.

Essential Bushcraft Skill #3: Water Collection & Purification
As a bushcraft skill, water collection and purification is exactly what it sounds like: learning where and how to collect water, and then also how to purify it for safe drinking. Water collection and purification isn’t hard (in most environments, anyway), but it is very important to know.
How to collect water
Along with sourcing water from creeks, lakes or natural springs, common water collection methods include using a camping tarp to catch rainwater or condensation. Depending on the location and climate, you might be able to collect water by melting snow or ice. You can also use an absorbent cloth to gather early morning dew off plants or surfaces, then wring out the water.
Some advanced water collection techniques include digging holes in dry riverbeds or lakes, foraging plants that contain drinkable water, or even making a solar still.
Avoid using water that smells bad or has excessive discolouration or sediment. Purifying water can mitigate this to an extent, but we strongly recommend using the cleanest available water source to start with.
How to purify water
Purifying water is a must in the wilderness. Even the most pristine mountain streams can contain contaminants such as bacteria, viruses, parasites and pollutants that can cause sickness.
Fortunately, there are a lot of ways to purify water and make it safer to drink. Here are some of the most effective water purification methods:
- Boiling is the most reliable water purification method for killing bacteria and viruses. Boil water for 1 minute at sea level or 3 minutes for altitudes over 1,900m.
- Chemical Treatment tablets or drops containing chlorine or iodine can purify water, but follow dosage instructions carefully.
- Filtration can effectively remove contaminants and improve water taste and appearance. When choosing a hiking water filter, always check the individual product specifications so you know what they can and can’t filter out.
- Ultraviolet (UV) Light can neutralise some contaminants such as bacteria, protozoa and viruses, but they won’t do anything to improve water taste or remove sediment.
- Solar Disinfection can be used to purify your water by placing it in plastic bottles and leaving them in direct sunlight for at least 6 hours. It’s not the most effective method, but it is better than nothing.
Water collection and purification tips
- Carry two water purification methods on your adventures so you have a back-up in case one fails.
- Do your research before leaving home. Take a look at a map and make a plan for where and how you’ll collect water.
- Have a water collection contingency plan. Think about what you’ll do if there isn’t water where you expected and carry a map with you so you can find other water sources in the area if needed.

Essential Bushcraft Skill #4: Navigation
Most of us rely on our smartphones or GPS devices to tell us where we are these days, And yes, although modern technology is great, it’s not always reliable in the wilderness. But knowing the basics of navigation isn’t just about being able to find your way back to safety when there is no reception; it is a practical skill that can give you more confidence on any outdoor adventure. Plus it’s a lot of fun.
Bushcraft navigation tips
There is a lot to say about all the different navigation techniques – more than we can possibly fit in this article – but here are some general tips to help you stay on track (pun intended) when first starting out:
- Invest in good quality navigation equipment. We recommend using topographical maps at a scale of 1:50,000 or 1:25,000, as this will give you a detailed representation of the terrain you’ll be covering. A lightweight and accurate orienteering compass is also an essential navigation tool. Look for something with a transparent baseplate that allows you to see the map underneath for easy route planning and navigation. Features like rulers, scales, and magnifying lenses are also helpful.
- Know your navigation tools. Before you put them to the test in the wild, study your topographic map. Take your time to educate yourself about how to interpret your map and can recognise the symbols and terrain represented there. You’ll also want to familiarise yourself with your specific model of compass and understand any features it has so you can make use of them effectively.
- Plan your route in advance. Take the time to plan your route and get to know the lay of the land. Consider factors such as distance, terrain difficulty, elevation gain, water sources, and weather conditions and choose areas or trails that match your skill level and experience.
- Practise your navigation skills somewhere that you’re already familiar with. Navigating can take a while to get the hang of, so it helps to practise in locations that you already are familiar with and feel comfortable navigating when first starting out.
- Be aware of your surroundings and regularly refer back to your map. Navigating isn’t just about learning to read a map, it’s about actually paying attention to your surroundings. As you move through the terrain, take note of mountains, rivers, lakes, trail junctions and other distinctive features along the trail and try to place them on your map. Over time, you’ll find that you naturally start to be more attuned to subtle landmarks and can estimate distances and times with more accuracy.
- Keep an eye on weather forecasts. Mist, rain, snow, and low visibility can make it much, much harder to navigate in the wilderness, so be prepared for changing weather conditions and adjust your plans accordingly.
- Consider carrying a back-up method of navigation. Just like firecraft, it can be helpful to carry a backup method of navigation. For example, if you are testing out your map and compass skills, you might want to carry a phone or GPS device with the relevant map downloaded as well.
- Always put safety first. Basic navigation skills aren’t difficult to learn, but it is important to practise in safe, familiar environments and always tell somewhere where you’re going and when you’ll be back. Hike with a friend or group whenever possible, especially in remote or unfamiliar areas, and take PLB along with you if possible.

Essential Bushcraft Skill #5: Wilderness First Aid
Being equipped with basic wilderness first aid knowledge allows you to respond calmly and effectively to medical situations, from minor cuts and sprains to allergic reactions and hypothermia.
Wilderness first aid also equips you with the knowledge to assess situations accurately and make informed decisions regarding first aid care. You can determine the severity of an injury and decide whether you need to seek further medical attention.
How to learn wilderness first aid
We recommend that you enrol in a wilderness first aid course that provides comprehensive training, hands-on practice, and certification. However, these courses are usually up to a week long and can set you back a few hundred dollars, so we understand that it might not be a viable option for everyone.
If taking a certified wilderness first aid course is not an option for you right now, you can still take online courses, read wilderness first aid manuals or watch free educational videos. While not a substitute for hands-on training, this is a great starting point for anyone who spends time outdoors.
Wilderness safety tips
- Choose activities that are appropriate for your experience and fitness level. It sounds simple, but honestly, you’d be surprised how often people don’t.
- Have a safety plan in place before you leave home. It is important to think about safety any time you are going on an adventure, especially if you’ll be in remote locations or in difficult terrain. We recommend making a detailed itinerary that includes contact details for emergency services.
- Research the area you are visiting and consider what health hazards or risks you might come across. Look into poisonous plants or insects in the area, as well as common injuries that might occur, such as slips, trips and falls. Other dangers may include hypothermia, heat stroke or drowning. By understanding what the risks are, you can do more to prevent them.
- If you’re travelling with a group, have a conversation about safety. It is important to be aware of any medical conditions or allergies that your group members have, what their experience and fitness level is and if they have any first-aid qualifications or expertise that could be useful in an emergency.
- Take a first aid kit. Again, you’d think this one would be obvious, but we know many experienced hikers who don’t take a first aid kit on their adventures. You can make your own basic first aid kit or buy one that is pre-made.
- Pack (and dress) for the conditions. Make sure that your clothing and gear is suitable for the weather conditions.
- Leave a copy of your planned itinerary with a responsible person and make sure they know your expected return time. Discuss what they should do if they haven’t heard from you by then.
- Stay hydrated. Drink water regularly throughout your trip, even if you don't feel thirsty.
- Be aware of your surroundings. Keep an eye open for potential hazards in your environment and pay attention to your surroundings so you know where you are and roughly how far you’ve travelled.
- Be ready to turn back or change plans. It can feel like a defeat to have to turn back when we have set ourselves a goal of reaching a certain destination. This is why many people keep pushing forward when it is unsafe to do so – sometimes with terrible consequences. If you are having a debate with yourself (or someone else) about whether or not to turn back because the conditions seem dangerous, then we would always encourage you to err on the side of caution.
You’re officially a bushcraft expert now!
Well, not quite, but good job for making it through this article all the way to the end. These five essential bushcraft skills are a great place to start levelling up your outdoor expertise. There are so many possible bushcraft skills to learn, but this will give you a solid understanding to enjoy the outdoors safely and responsibly.